What to sort, photograph and confirm before requesting a quote or scheduling pickup
If you are wondering how to prepare for junk removal in London, Ontario, start by deciding what will leave, separating wanted belongings, taking clear photos and identifying access challenges. Preparing for junk removal does not mean carrying every couch, appliance, or heavy box to the curb yourself. A better approach is to decide what is leaving, keep wanted belongings clearly separate, photograph the items and access route, disclose anything heavy or unusual, and confirm the responding provider’s preparation requirements before moving anything difficult.
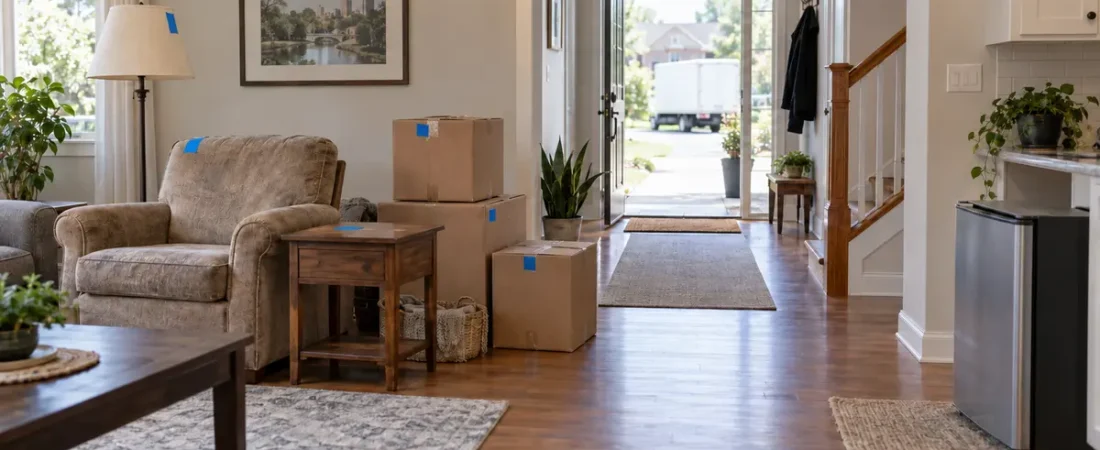
For most London, Ontario homes, the easiest method is to work one room at a time. Create a simple inventory as you go, use removable tape or notes to identify items for removal, and keep hallways, stairs, doors, and exits unobstructed. Do not hide liquids, batteries, sharp objects, chemical products, or very dense material inside bags or boxes.
If you are still at the quote stage, clear photographs and honest access details are usually more useful than trying to stage the entire job outside. You can request a no-obligation junk-removal quote in London, Ontario after completing the checklist below. The responding provider should confirm what it accepts, what preparation is required, whether indoor removal is included, and what may change the estimate.
Last reviewed: September 6, 2026. Provider policies, City programs, facility rules, and disposal requirements can change. Confirm current instructions before moving or setting out any material.
Quick junk-removal preparation checklist
| Step | What to do | Why it matters |
|---|---|---|
| 1. Decide | Separate items into keep, donate, recycle, remove, and confirm-first groups | Prevents wanted belongings from being removed and identifies questions early |
| 2. Inventory | Count large items and estimate the number of boxes, bags, or piles in each room | Gives the provider a clearer view of the job’s scope |
| 3. Photograph | Take wide room photos, item close-ups, and pictures of stairs, doors, elevators, and parking | Helps explain volume, condition, size, and access |
| 4. Disclose | Identify appliances, heavy items, renovation debris, liquids, batteries, cylinders, sharp objects, damage, mould, or pests | Allows the provider to review acceptance and handling requirements |
| 5. Protect | Remove valuables, documents, medication, keys, identification, and data-bearing devices | Reduces the chance of accidental loss or privacy problems |
| 6. Clear access | Remove small trip hazards from the normal route without attempting unsafe lifting | Helps the provider assess a workable removal path |
| 7. Confirm | Ask what must be bagged, boxed, disconnected, dismantled, wrapped, or left in place | Preparation rules vary by provider and item |
| 8. Recheck | Complete a final walkthrough before the appointment begins | Catches items placed in the wrong group |
This is a general planning checklist. It is not a promise that a provider will accept every item or remove belongings from every location inside a property.
Before going room by room, set up a simple sorting system
A whole-home cleanout can become confusing when several people are making decisions. Before you start, choose one visible method that everyone understands.
Use five clear categories
- Keep: Items staying in the home or moving to another property.
- Donate or give away: Usable belongings you plan to deliver, have collected, or offer to someone else.
- Recycle or use a municipal program: Materials that you intend to handle through an appropriate recycling, depot, stewardship, or City service.
- Request removal: Items you want included in the private junk-removal quote.
- Confirm first: Anything heavy, connected, damaged, contaminated, sharp, pressurized, chemical, unidentified, or otherwise unusual.
Use different coloured removable tape, separate zones, or clearly placed paper notes. If you use written notes, make the wording obvious—such as “KEEP” and “REMOVE”—and make sure every decision-maker uses the same system. Do not attach tape to a delicate finish where it could cause damage.
Items do not necessarily need to be moved into one large pile. Keeping them in their original rooms can be safer, especially when they are heavy or when the gathering area would block a hallway or exit. A room-by-room inventory can tell the provider where everything is located.
Start one master inventory
Write the room name followed by the items you want removed. Count major pieces individually and group smaller material sensibly. For example:
- Living room: one three-seat couch, one armchair, one coffee table, two lamps
- Kitchen: one disconnected microwave, one small table, four chairs, six boxes of non-hazardous household items
- Basement: one dresser, one exercise bike, approximately 12 boxes, narrow staircase with one turn
- Garage: two shelving units, eight bags of ordinary clutter, scrap metal kept separate, three containers requiring acceptance confirmation
Avoid descriptions such as “some junk” or “one room full.” Those phrases do not show the provider whether the job involves light boxes, dense renovation debris, awkward furniture, stairs, or materials requiring special handling.
Living room and family room checklist
Living rooms often contain the bulkiest furniture in the home. Start by identifying every couch, sectional piece, recliner, armchair, entertainment unit, table, lamp, rug, shelf, and boxed item that may be leaving.
- Count sectional pieces separately and photograph how they connect.
- Measure unusually wide couches, cabinets, or entertainment units.
- Photograph the item and the doorway, hallway, or stair turn it must pass through.
- Empty drawers, shelves, and storage compartments before the appointment unless the provider tells you otherwise.
- Remove cash, remotes, documents, jewellery, photographs, keys, and small personal belongings from between cushions and inside drawers.
- Identify glass shelves, mirrored panels, loose hardware, or sharp broken edges.
- State whether a sofa contains a pull-out mattress or whether a recliner has powered components.
- Mention stains, water damage, mould, pests, bodily-fluid contamination, or other conditions before anyone arrives.
Do not dismantle a large unit simply because it looks difficult to move. Ask whether the provider expects it to remain assembled, will dismantle it as part of the service, or wants specific preparation completed in advance. Removing doors, cutting frames, or handling broken glass without a safe plan can create more risk than leaving the piece in place.
For a project focused mainly on couches, mattresses, tables, or cabinets, review the furniture-removal quote page.
Kitchen and dining-area checklist
Kitchen items can look straightforward while hiding food, liquids, sharp objects, batteries, or connected appliances. Sort the area carefully instead of packing everything together.
- Empty food, liquids, grease, cleaning products, medication, and personal papers from furniture or appliances being removed.
- Pack ordinary dishes or cookware only if you intend to include them, and protect sharp or breakable pieces appropriately.
- Keep knives, loose glass, and other sharp items separate and disclose them.
- Photograph dining tables, hutches, cabinets, chairs, and appliances from enough distance to show their full size.
- State whether an appliance is freestanding or built in.
- Explain whether water, drain, electrical, gas, or ventilation connections remain.
- Empty and clean refrigerators or freezers, and mention whether ice, water, or refrigerant-related issues are present.
- Secure removable shelves or drawers only after the provider confirms the preferred preparation method.
Do not disconnect a gas line, hard-wired appliance, water connection, or other utility unless you are qualified and permitted to do so. Do not assume the removal provider performs plumbing, gas, electrical, carpentry, or refrigerant work. Confirm which trades or preparation steps are required before the appointment.
For large household equipment, use the appliance-removal quote page and include photographs of both the appliance and its travel path.
Bedroom and closet checklist
Bedrooms require an especially careful keep-or-remove review because personal, financial, and sentimental items are often stored inside furniture.
- Empty dressers, nightstands, wardrobes, desks, under-bed drawers, and storage benches.
- Check mattress seams, bed frames, pockets, luggage, handbags, shoe boxes, and clothing bins.
- Remove identification, passports, tax records, medical information, jewellery, money, keys, photographs, and keepsakes.
- Decide whether the mattress, box spring, bed frame, headboard, and each piece of a bedroom set are all leaving.
- Photograph adjustable bases, powered furniture, bunk beds, oversized wardrobes, and solid-wood pieces.
- Tell the provider if furniture is upstairs, inside a basement bedroom, or behind a narrow turn.
- Disclose bed bugs, mould, water damage, or other contamination before moving or wrapping an item.
Do not place donation clothing, bedding, or wanted items beside the removal group unless they are visibly and unmistakably separated. During a larger family or estate cleanout, assign one person to approve sentimental belongings before they enter the removal zone.
If a mattress or furniture item is affected by bed bugs, do not assume that private-provider preparation matches municipal collection rules. Ask the provider what it requires. The City’s separate curbside program currently requires bed-bug-contaminated bulky items to be wrapped and sealed in plastic, but a private provider may set different or additional conditions.
Bathroom and laundry-area checklist
Bathrooms and laundry rooms often contain products that should not be mixed with ordinary household clutter.
- Remove medication, aerosols, cleaners, bleach, drain products, nail products, toiletries, and unidentified liquids from cabinets or furniture being removed.
- Keep chemical products in their original containers when possible and do not combine them.
- Separate batteries, fluorescent bulbs, sharps, and pressurized containers for appropriate review or disposal.
- Empty hampers, linen cabinets, shelves, and appliance drums.
- Photograph washers, dryers, utility sinks, storage cabinets, and tight doorways.
- State whether laundry appliances are stacked, installed on a pedestal, connected to water or gas, or located on a different floor.
- Mention floor drains, low ceilings, narrow stairs, or other access conditions.
A junk-removal request should not be used to conceal hazardous or regulated products inside bags or furniture. London residents can check the City of London’s Household Hazardous and Special Products guidance for current municipal disposal information.
Basement checklist
Basements deserve their own plan because stairs, low ceilings, poor lighting, tight turns, damp conditions, and heavy stored items can change how a provider approaches the job.
- Photograph the basement from more than one angle so the amount of material is visible.
- Photograph the full staircase, landings, turns, handrails, ceiling clearance, and doorway at the top.
- Count boxes, bags, bins, shelving units, furniture, appliances, exercise equipment, and renovation material separately.
- Identify anything wet, mouldy, dusty, pest-affected, rusted, unstable, or contaminated.
- Keep furnace, electrical-panel, water-heater, sump-pump, and exit access clear.
- Remove personal documents, storage media, valuables, and items you want to keep.
- Explain whether there is a walkout, side entrance, shared hallway, or only one interior staircase.
- Mention flooring or wall areas that need extra care during carrying.
You normally do not need to carry heavy basement items upstairs just to request a quote. In many cases, clear photos and accurate measurements are more useful and much safer. Confirm whether indoor removal, stair carrying, protection, dismantling, and additional labour are included in the responding provider’s scope.
For a basement-specific project, visit the basement-cleanout quote page.
Garage and shed checklist
Garages and sheds frequently mix ordinary clutter with automotive products, tools, batteries, fuel, paint, cylinders, scrap metal, yard material, and very heavy items. Do not treat everything in the space as one category.
- Separate ordinary household items from liquids, chemicals, automotive products, batteries, propane cylinders, fluorescent tubes, pesticides, and unknown containers.
- Never hide a liquid, chemical, battery, cylinder, or sharp object inside a box or opaque bag.
- Identify fuel-powered equipment and state whether fuel, oil, or batteries remain.
- Count tires, rims, car batteries, scrap-metal pieces, shelving units, tools, and machines separately.
- Photograph tool chests, workbenches, freezers, large equipment, overhead storage, and dense material.
- Describe whether the garage opens directly to the driveway and whether a vehicle can approach it.
- Unlock gates and remove ordinary trip hazards only when it can be done safely.
- Keep anything you plan to sell or retain in a clearly separate area.
Provider acceptance varies. Before preparing any unusual garage material, review the guide to what junk-removal companies may and may not take in London, Ontario and ask the responding provider to confirm each item.
Use the garage-cleanout quote page for a garage-focused request.
If winter parking is your main goal, follow this fall garage cleanout plan before deciding what storage to keep.
Home office, storage room, and hobby-area checklist
These rooms can contain sensitive information, small valuable items, electronics, batteries, blades, adhesives, or specialty materials.
- Back up computers and phones before they leave your control.
- Remove data securely from hard drives, printers, copiers, tablets, and other storage-capable devices.
- Take keys, access cards, employee records, customer information, tax records, and confidential papers out of the removal group.
- Identify monitors, printers, batteries, fluorescent lamps, and electronics separately.
- Remove ink, toner, solvents, adhesives, craft chemicals, blades, and pressurized products from ordinary boxes.
- Label wanted inventory and reusable business equipment clearly.
- Photograph desks, filing cabinets, shelving, display fixtures, and equipment from several angles.
- Note elevators, loading areas, building access hours, and parking restrictions for an office or commercial unit.
Do not assume a hauling provider offers document shredding or certified data destruction. Arrange those services separately unless they are expressly offered and confirmed. Businesses can use the commercial junk-removal quote page for a project-specific request.
Yard, patio, and outdoor-area checklist
Outdoor cleanups may combine plant material, patio furniture, barbecues, planters, soil, stones, fencing, play equipment, sheds, hot tubs, and storm debris. The material type and access route are as important as the visible pile size.
- Separate branches, brush, leaves, and plant trimmings from soil, sod, rocks, stumps, lumber, fencing, and household junk.
- Show whether the material is loose, bagged, bundled, wet, frozen, or mixed.
- Photograph the pile with a familiar object nearby for scale, while keeping the full pile visible.
- Explain whether access is through a narrow side gate, shared alley, steep grade, deck, or fenced backyard.
- State whether any structure or equipment is still anchored, wired, plumbed, or connected to gas.
- Identify fuel, propane cylinders, batteries, chemicals, broken glass, nails, or sharp metal separately.
- Do not dismantle a shed, hot tub, play structure, fence, or connected outdoor appliance unless the scope and safe preparation have been confirmed.
The City’s yard-waste rules apply to its municipal program, not automatically to a private provider. If you are considering City collection or an EnviroDepot, review the current City instructions before bagging or bundling the material. For a private quote, use the yard-waste removal page and describe the material exactly as it currently sits.
How to take useful photos for a junk-removal quote
Good photos can help a provider understand the job, but one close-up rarely shows enough. Use a short sequence for each room or outdoor area.
- Take a wide room or area photo. Stand far enough back to show the whole group and its surroundings.
- Photograph each major item. Show couches, appliances, cabinets, equipment, or unusually heavy pieces individually.
- Show condition and special features. Include damage, loose glass, drawers, pull-out sections, electrical components, water exposure, or contamination without opening unsafe containers.
- Show the travel path. Photograph doors, hallways, staircases, landings, elevators, gates, and tight corners.
- Show parking or loading access. Include the driveway, legal curb area, loading bay, or distance from the building when relevant. Do not include personal information or readable licence plates.
- Add measurements where they matter. Note the approximate width, height, and depth of oversized items, plus a tight doorway or stair opening.
- Match the photos to the inventory. Numbered items or room names can prevent confusion when several spaces are included.
Avoid filtered, dark, cropped, or outdated photographs. Do not rearrange the scene in a way that hides material behind furniture or makes the job look smaller. If more items are added after the quote, send updated information before the appointment.
Prepare access without attempting unsafe lifting
Access preparation should focus on communication and ordinary housekeeping—not on moving objects that are beyond your ability.
- Pick up small trip hazards, loose toys, cords, shoes, and floor clutter from the expected route.
- Keep stairs, hallways, exterior steps, and exits adequately lit.
- Secure pets in a separate safe area.
- Arrange for children and anyone not involved in the appointment to stay away from the work route.
- Mention weak stairs, loose railings, soft ground, low ceilings, steep grades, ice, snow, or other hazards.
- Move your own vehicle only when necessary and legal, and explain local parking or loading restrictions in advance.
- For condos or apartments, reserve an elevator or loading area if the building requires it.
- Tell the provider about door codes, concierge procedures, loading-hour limits, locked gates, or a long carrying distance.
- Protect private rooms by closing them and marking them as off limits.
Do not block a fire exit or common hallway by staging items outside the unit. Do not drag heavy furniture across floors, attempt a difficult stair carry, or lift an appliance merely to reduce the estimated labour. Ask the responding provider what it needs and what is included.
Access can affect labour and scheduling. For a fuller explanation, see what affects junk-removal prices in London, Ontario.
Apartment, condo, and rental-property preparation
Multi-residential properties can add rules that do not exist at a detached home. Before scheduling, check with the landlord, condominium corporation, superintendent, or property manager about:
- Elevator reservations and protective elevator pads
- Approved entrances and loading areas
- Parking permits or temporary loading instructions
- Move-in and move-out hours
- Door, fob, key, or concierge access
- Hallway and lobby protection
- Noise and common-area rules
- Whether material may be staged outside the unit
Do not leave furniture beside a building’s bins, in a garbage room, on the boulevard, or in a shared hallway unless the property manager and applicable collection program allow it. If a tenant has left belongings behind, the property owner or manager should also confirm the legal authority and documentation needed before treating those belongings as junk.
For tenant turnover projects, use the landlord and rental-property cleanout page and explain any deadline for cleaning, repairs, showings, or a new occupancy.
Private junk removal and City collection are different options
Preparing for a private junk-removal provider is not the same as preparing material for municipal curbside collection.
The City of London currently requires eligible residential households to request collection for large furniture and bulky items. Its page lists a limit of up to four large items per booking request and gives specific set-out instructions. Appliances, electronics, renovation materials, vehicle parts, batteries, tires, mostly metal items, and loose or improperly prepared material are excluded from that curbside bulky-item program. Review the City’s current curbside garbage and bulky-item instructions if you plan to use municipal collection.
The City also operates EnviroDepots for specified yard waste, recyclables, electronics, scrap metal, appliances, tires, batteries, propane tanks, and certain other materials under current rules. Facility acceptance, quantity limits, preparation, hours, and fees can change.
A private provider may accept something the City will not collect at the curb, or it may decline an item for its own safety, equipment, disposal, or business reasons. Confirm the requirements for the option you actually plan to use. Do not combine the two sets of instructions.
What not to do before junk removal
Preparation can cause problems when it hides the true scope or creates new hazards. Avoid these common mistakes:
- Do not hide restricted or questionable material. List it separately and ask for an acceptance decision.
- Do not overfill bags or boxes. A container that looks small can become unsafe when filled with books, tile, soil, metal, or other dense material.
- Do not mix keep and remove items. Use separate areas or unmistakable markers.
- Do not empty connected appliances until you understand the preparation required. Food and personal contents should be removed, but utility disconnection requires the right plan and, in some cases, a qualified person.
- Do not dismantle heavy or powered equipment without confirmation. Parts can become unstable, sharp, or harder to handle.
- Do not stage items where they block exits or common areas. Safety and building rules still apply.
- Do not move heavy items solely to make a photo look convenient. Show the provider the actual location and route.
- Do not assume donation or recycling. Ask the provider about its current practices; outcomes depend on item condition and available facilities.
- Do not add a last-minute pile without notice. New volume, weight, item types, or access conditions may change the quote or acceptance decision.
The final 24-hour and arrival-day checklist
About 24 hours before
- Confirm the date or arrival window directly with the responding provider.
- Confirm the address, unit number, phone number, parking or loading instructions, and entry procedure.
- Review the latest inventory and send updated photographs if the scope has changed.
- Ask which items must be boxed, bagged, wrapped, emptied, disconnected, or left as they are.
- Confirm whether indoor removal, stairs, elevators, dismantling, special handling, and cleanup are included.
- Confirm which materials will not be accepted and remove them from the pickup group.
- Put valuables, medication, documents, keys, identification, and wanted items in a secure off-limits area.
- Check weather-related access, including snow, ice, rain, mud, or a blocked driveway.
Before the appointment begins
- Secure pets and keep children away from the travel path.
- Unlock only the necessary doors or gates.
- Turn on lights in basements, hallways, stairs, garages, and storage rooms.
- Remove ordinary trip hazards that you can handle safely.
- Walk through every room and compare the removal group with your inventory.
- Identify the person authorized to approve scope or price changes.
- Review the provider’s final price, included work, excluded items, payment method, and any conditions before work begins.
- Complete a final walkthrough after the agreed work is finished and before the provider leaves.
Frequently asked questions
Do I need to move all my junk outside before pickup?
Not necessarily. Some providers may remove items from inside a home, basement, apartment, garage, or office, while others may quote differently for curbside or easily accessible material. Describe where each item is located and ask whether indoor removal, stairs, carrying, and dismantling are included. Do not move a heavy or awkward item unless you can do so safely and the provider has confirmed the plan.
Should everything be boxed or bagged?
Small loose household items may be easier to inventory when boxed or bagged, but the correct preparation depends on the material and provider. Do not put liquids, chemicals, batteries, sharp objects, pressurized containers, unknown products, or very dense debris into ordinary mixed bags. Ask before packing anything questionable.
What photos should I send for a junk-removal quote?
Send a wide photo of each room or pile, a clear view of every large item, close-ups of damage or special features, and photos of stairs, doorways, elevators, gates, and parking access. Add approximate measurements for oversized items or tight openings. Make sure the photos represent the current job.
Should I take furniture apart before junk removal?
Only after the responding provider confirms that dismantling is required and explains who is responsible for it. Taking furniture apart can create loose hardware, sharp edges, unstable sections, or extra work. Photograph the assembled item and access route first.
Do appliances need to be disconnected?
Providers may require appliances to be empty and safely disconnected before removal. Requirements vary by appliance and connection type. Gas, hard-wired electrical, plumbing, ventilation, and refrigerant-related work may require an appropriately qualified person. Confirm the exact requirement rather than disconnecting it automatically.
How should I prepare paint, chemicals, batteries, or propane cylinders?
Keep them separate from ordinary junk and disclose each item before booking. Do not mix products, pour them out, conceal them in boxes, or assume they are accepted. The City of London provides current guidance for hazardous and special products, but a private provider makes its own acceptance decision.
What access information should I include?
Mention the floor, staircase shape, elevator rules, door and hallway widths, long carrying distances, gates, driveways, loading zones, parking restrictions, building hours, ice or snow, and any damaged or weak surfaces. Photographs of the complete travel path are helpful.
How should landlords prepare for a rental-property cleanout?
Confirm that the belongings may legally be removed, document the unit before work begins, separate fixtures or owner property from tenant belongings, identify hazards, provide keys and building instructions, and state any deadline. The responding provider should confirm scope, accepted material, price, and availability.
Can I add more items on pickup day?
You can ask, but the provider may need to revise the price, vehicle space, labour plan, timing, or acceptance decision. Send updated information as soon as possible instead of assuming extra items will fit within the original quote.
Does London Junk Removal Quotes send its own removal crew?
No. London Junk Removal Quotes is an independent quote-request and lead-generation website. Information submitted through the form may be shared with or answered by an independent local service provider. Each responding provider determines its preparation requirements, accepted materials, pricing, availability, qualifications, and service terms.
Request a junk-removal quote in London, Ontario
A clear inventory, representative photographs, and honest access details can make a request easier to review. Work room by room, protect what you are keeping, disclose unusual materials, and avoid unsafe lifting or disconnection work. Then ask the responding provider to confirm exactly what must be done before the appointment.
Request My Free Junk-Removal Quote
London Junk Removal Quotes is an independent quote-request and lead-generation website. Information submitted through the form may be shared with or answered by an independent local service provider for the purpose of responding to the request. Preparation requirements, item acceptance, pricing, availability, provider qualifications, and service terms are determined by the provider.